

Appearance
Quick Start: Add Your First Episode
This guide gets you up and running quickly by walking you through adding your first podcast episode to a WordPress post or page using PodcasterPlus Blocks.
Goal: insert an episode with a pre-designed player in under five minutes.
Prerequisites:
- PodcasterPlus Blocks plugin installed and activated.
- Your podcast RSS feed successfully connected in the plugin settings.
Add an episode
Create content: start a new post or page in WordPress (Posts → Add New or Pages → Add New).
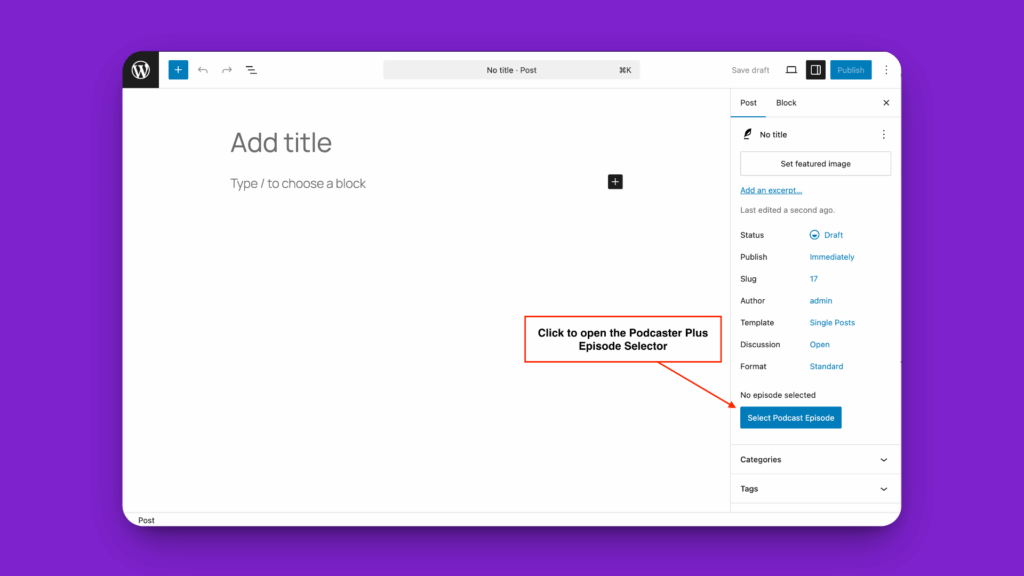
Launch the Episode Selector: in the WordPress block editor settings panel (usually on the right), click the button labelled Select Podcast Episode. This opens the Episode Selector modal.
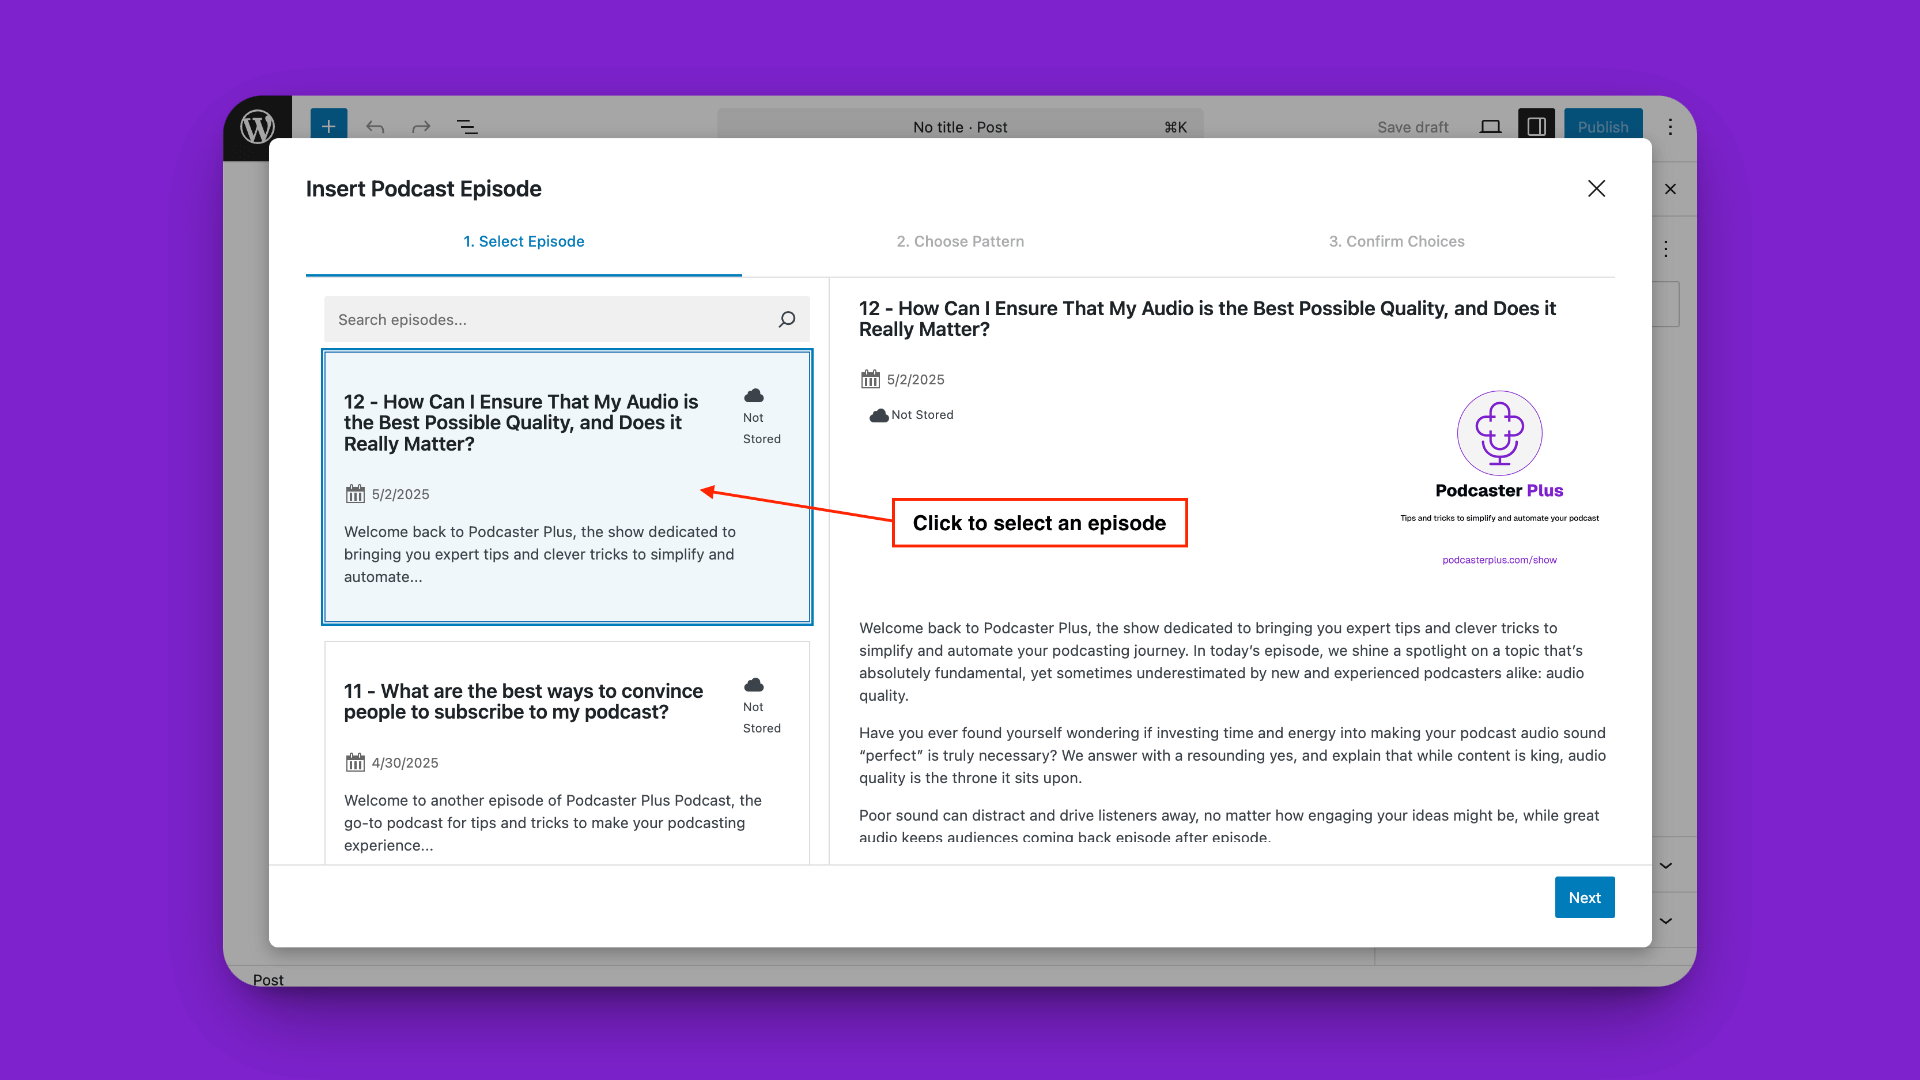
- Select an episode: the modal loads episodes from your connected RSS feed. Browse or search for the one you want. You can view the title, description, and image, and even listen to a preview, then click the episode to select it.
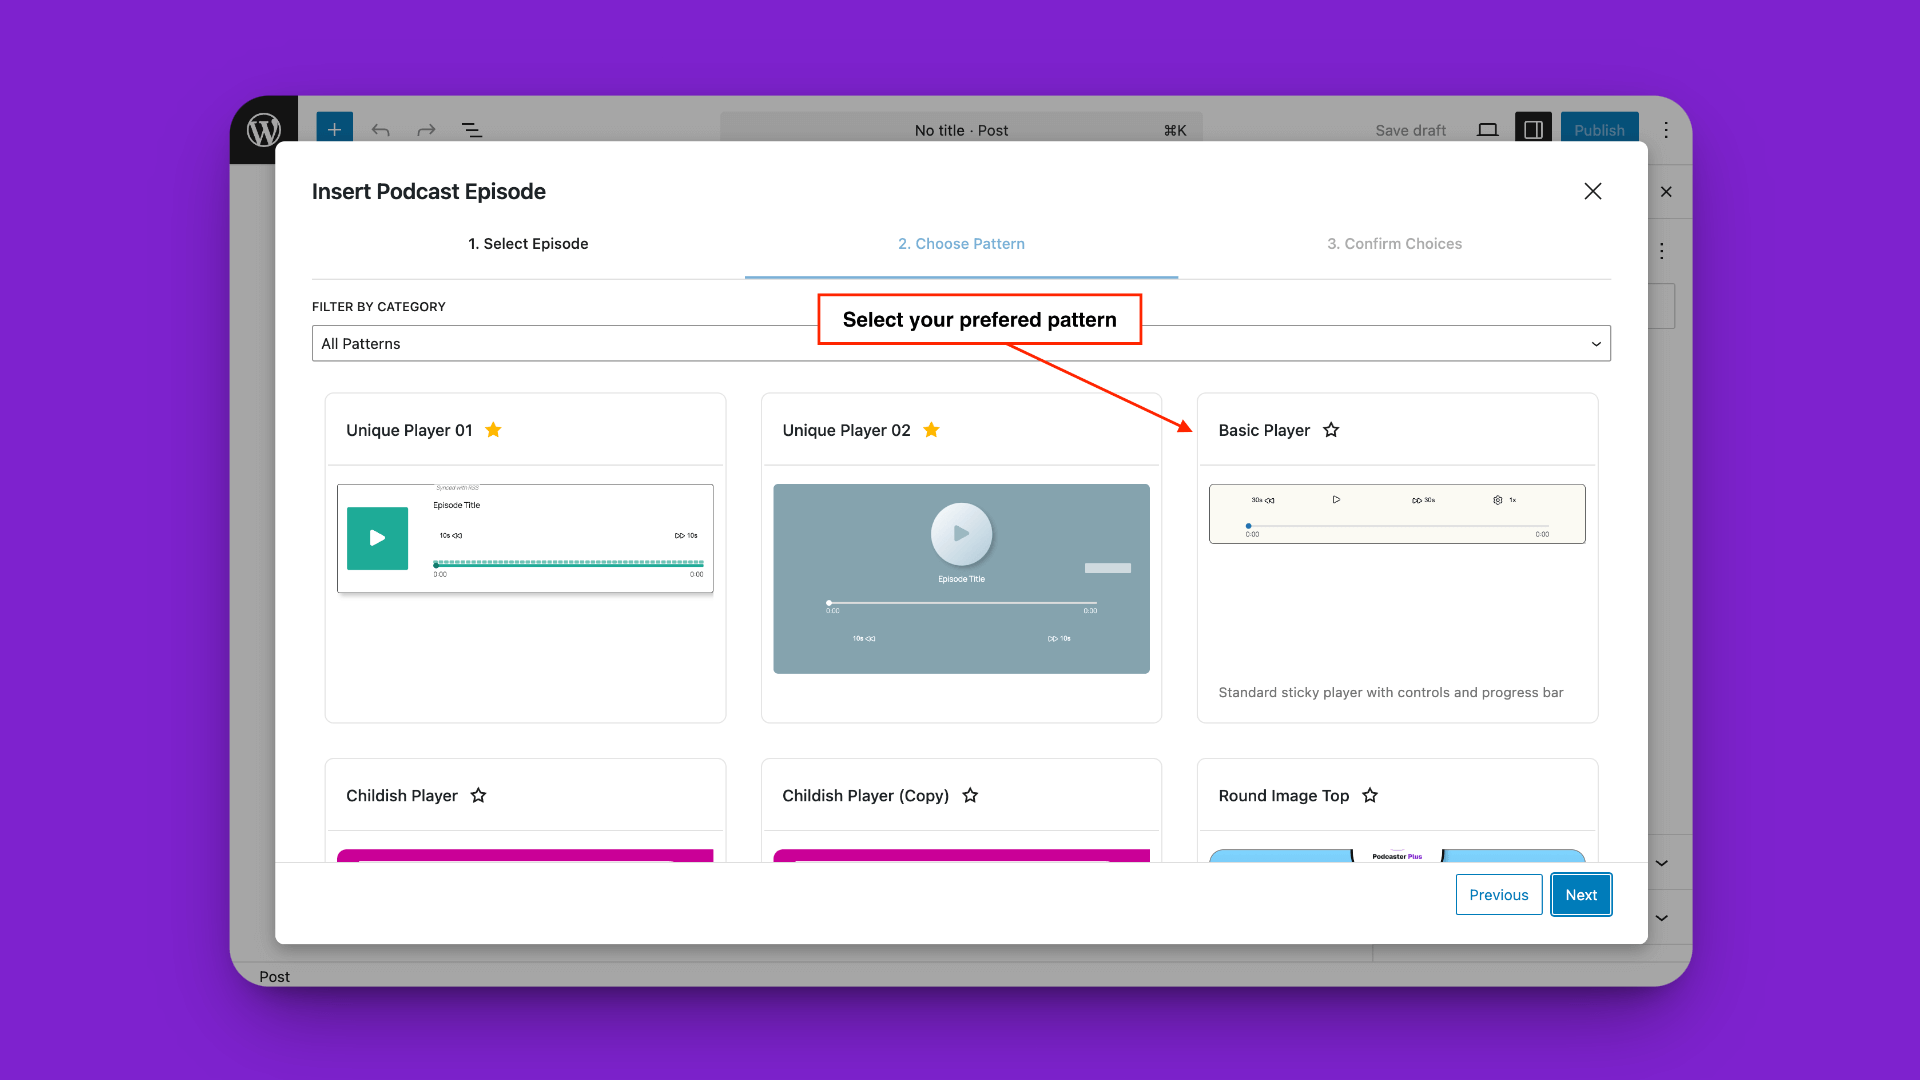
- Choose a player pattern: pick from the pre-made player layouts (patterns) built with PodcasterPlus Blocks. You can also mark patterns as favourites with the star icon so they appear first next time. Click the pattern you want.
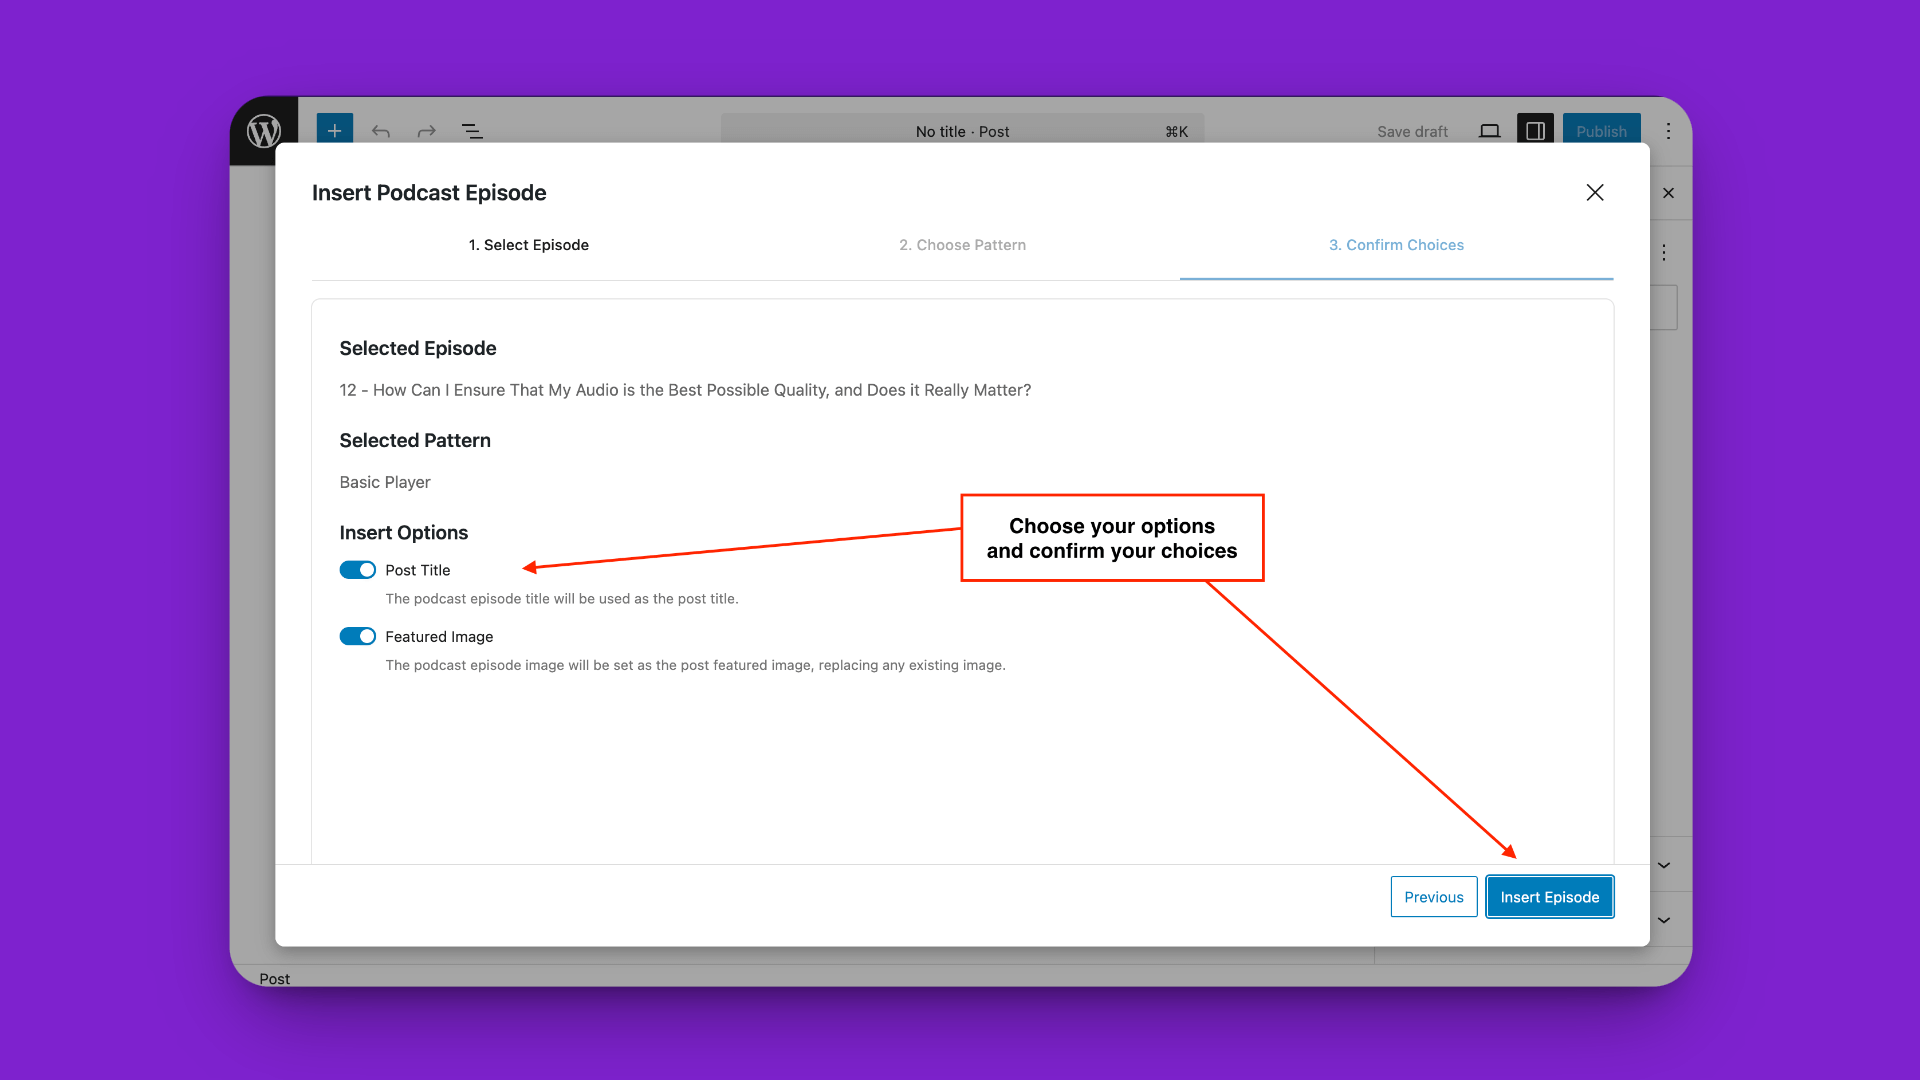
- Set the insertion options: decide whether the plugin should set the post title to the episode title, and the featured image to the episode image. Tick the boxes you want, then click Insert Episode.
Content inserted: the modal closes and the chosen pattern, populated with the episode's title, description, image, and player, is inserted into the block editor.
Publish or preview: edit the post further if you like (the inserted content uses standard core blocks wrapped by ours, so it stays editable), then Publish or Preview your post.
Congratulations, you have added a podcast episode to your content using PodcasterPlus Blocks.
Video tutorial
What's next?
- The Blocks: explore the individual blocks and their settings.
- Styling and Components: customise your player's appearance.